For Fall or Halloween: Kabocha Squash Tart.
To get started with this recipe, we have to first prepare a few components. You can make for fall or halloween: kabocha squash tart using 22 ingredients and 20 steps. Here is how you cook that.
The ingredients needed to make For Fall or Halloween: Kabocha Squash Tart:
- Get 400 of to 500 grams Kabocha squash.
- Make ready 400 ml of Water.
- Prepare 2 of cups' worth Sugar.
- Get of 1:1 water to sugar ratio.
- Take 20 grams of Honey.
- Get 1 of Butter.
- Make ready of The tart crust:.
- Make ready 75 grams of Unsalted butter.
- Make ready 35 grams of Granulated sugar (or white sugar).
- Prepare 1 large of Egg yolk.
- Make ready 110 grams of Cake flour.
- Make ready 40 grams of Almond flour.
- Prepare of For the almond cream:.
- Get 60 grams of Unsalted butter.
- Get 60 grams of Ground almond powder.
- Prepare 60 grams of Granulated sugar (or white sugar).
- Make ready 1 large of Egg.
- Take 1 tsp of Rum (optional).
- Make ready of For the topping:.
- Get 200 grams of Heavy cream.
- Get 15 of to 20 grams Sugar.
- Take 1 of Nappage.
Steps to make For Fall or Halloween: Kabocha Squash Tart:
- Make the tart crust. Refer "Basic Tart Crust"by user "Yukirain"..
- Make the almond cream. Mix the room temperature butter and sugar together. When they are mixed together, add the egg and mix again..
- Add the sifted almond flour and mix in. Add rum to taste..
- Put the almond cream in the tart crust, and bake in a preheated 360°F/180°C for about 40 minutes..
- When it's baked, leave to cool in the tart pan..
- While the tart cools, make the topping. Cut the kabocha squash into 1-2 cm cubes and cut up the skin (you could cut up the skin after cooking the kabocha squash)..
- Put water, the sugar, and honey in a pan and heat until the sugar is dissolved. Add the kabocha squash and cut up the skin..
- When it's bubbling, turn the heat down to low. Cover with a piece of aluminium foil placed on top of the contents of the pan to act as a drop lid (otoshibuta). Simmer until a bamboo skewer goes through a piece of kabocha squash easily..
- When the kabocha squash has been simmered until tender, turn off the heat and leave in the pan until cooled (if possible, leave it to cool in the refrigerator until the next day)..
- When the kabocha squash has cooled, take each piece out and pat dry with paper towels..
- Heat a pan to melt the butter, and sauté half of the dried kabocha squash pieces..
- You just need to brown the pieces slightly (I just did half the pieces, but you can sauté all the kabocha squash if you like. Or you can omit this step entirely. It's up to you.).
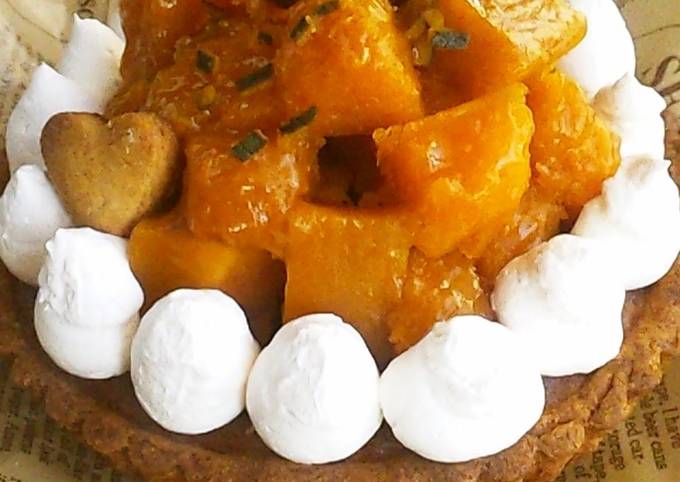
- When the kabocha squash is sautéed, pile them up on the baked and cooled tart..
- Brush with the apricot glaze. Chop up 2 to 3 of the simmered kabocha squash skin pieces and scatter on top..
- Whip the cream with sugar until soft peaks form, and decorate the tart with it. (I used a round icing tip, but use whatever you like.).
- If you have time, you should have some leftover tart crust dough, so make some cut out cookies with it to decorate the tart with..
- Since this tart is for Halloween, I made pumpkin and heart shaped cut out cookies to decorate..
- You can also dust the perimeter of the tart with powdered sugar..
- You don't have to sauté the kabocha squash pieces, but the butter fragrance makes the tart more delicious, so I recommend it..
- Here's how it looks when cut..
So that's going to wrap this up for this exceptional food for fall or halloween: kabocha squash tart recipe. Thanks so much for your time. I'm confident that you will make this at home. There is gonna be interesting food at home recipes coming up. Remember to save this page on your browser, and share it to your loved ones, colleague and friends.
Post a Comment